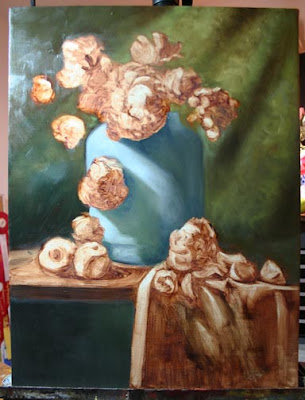
I worked some darker umber and Ultramarine Blue into the background on the lower left hand side and into the shadows on the tapestry.
For the vase, I used my usual mix of black, Cadmium Yellow Light and white along with a touch of the background color. For the light struck area, I used Cremintz White with a touch of Ultramarine Blue. Some of the shadow color was added as well. This is only a preliminary under painting for the vase.

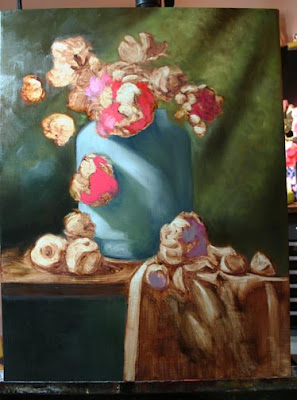
I brushed this color combo into the areas where the darker richer interiors of the Peony face away from the light. I used a bit of Cadmium Orange to place warmth into those shadows.
When I mix these colors, I try not to over mix them with a palette knife, but instead use my brush and whip them up a bit to where they are delicately blended - like making muffin batter. Too much mixing and the muffins go flat.
For the reflected lights - always a tough call - I used a bit of Quinacridone Pink which has more blue in it. This was mixed with a bit of background color that had been lightened with touches of white to gray it a bit. Shadows are always deeper near to the object which casts them. So I brushed a bit of Raw Umber mixed with Ultramarine Blue into the shadows closest to the Peonies. The vase is still very simple at this point. I'm only suggesting the shape at the bottom where the shadow curves a bit. Later, I'll place some background color to deepen shadows and bring atmosphere forward into the painting. I've also deepened the shadows on the tapestry in the background.
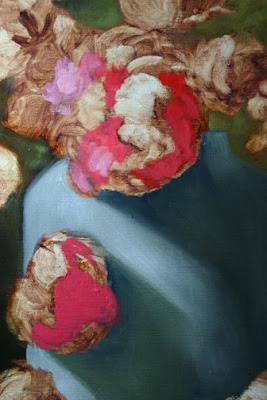
 Here's the close up. You can see the brush work is kept light. When painting the inside of a flower, you have to figure that that part of the bloom is receding from you and paint it thinly - just as you would shadows.
 Here I've started to put in the highlights on the lit side of the flower. The paint is quite thick. I'm using the same color that I used in the interior passages but lightened with Cremintz White. I'm using a 1/2" DaVinci Filbert Bristle brush. Bristles are best for impasto work because they are just stiff enough to hold the paint.
For the initial strokes I used a 1/4 inch brush but decided that it looked too picky so I changed to a larger one and went to a technique that I'm comfortable with.
I didn't have anyone to take a picture of me laying in the petals so I'll have to describe the technique. After I've loaded the brush, I lay the bristle's at a 30 degree angle to the canvas and starting at the center of the bloom I make the petal using one stroke by pulling the brush outward to circumference of the flower. I apply more pressure at the start of the stroke and lift off the brush at the back end of the stroke. This is a little tricky and takes some practice.
This stroke is more evident in the last two pictures.
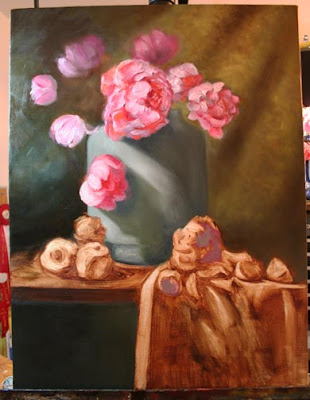
Notice that the lights are bright, but there's not enough punch or contrast between them and the shadows. This is because Cremintz is a low tint white. I'll fix that in the end by using a bit of the same color mix but with Titanium White and some Maroger Medium.
I next moved on to the back ground flowers. These were mixed with a bit of Quinacridone Rose which has a bit of blue in it. You can see that color in the flowers facing away from you. Because they are in the background and less distinct, I softened the edges by brushing some of the background into them.
Notice the large bloom in the front and the smaller bloom just behind it. There's not a huge difference in value here so I used a bit of edge control to push the one on the right back by making the edge of the flower in front a bit crisper. I also used little or no detail in the inside of the flower on the right. Less detail, less reason to spend time looking at it. Control your viewer's eyes by the use of edges as well as values.
Notice that I've painted out the leaves. I decided I would rather design them as I go in the last sitting. Those are details that will be a bit demanding and may take more than one sitting to get right so I'd rather not have to paint background around them when I'm done. Instead I'll use some Maroger to oil out the canvas and paint into it with the leaf colors when I'm ready. The background is an easy mix and can also be added if needed at a later point without having matching problems.
 OK. I took another shot here to better evaluate the light. For this stage of the painting, I'm satisfied. I can see where I will want to darken some of the flowers on the left. This, however, is best left until they are dry and then I can just glaze into them. I rearranged the shapes of the larger flower and used the larger brush to do the petals. I have two more flowers to paint in the next session and then I want to re-evaluate the background and the overall shape of some of the blooms. Once I've tweaked those, I'll start into the objects on the table.
For the background, I'm considering a glaze with a very thin coat of blue to cool it a bit. I can better evaluate it in the light of day however, and I'll rethink it all in the morning. Good night and I'll continue with you tomorrow. Thanks for stopping by.

No comments:
Post a Comment